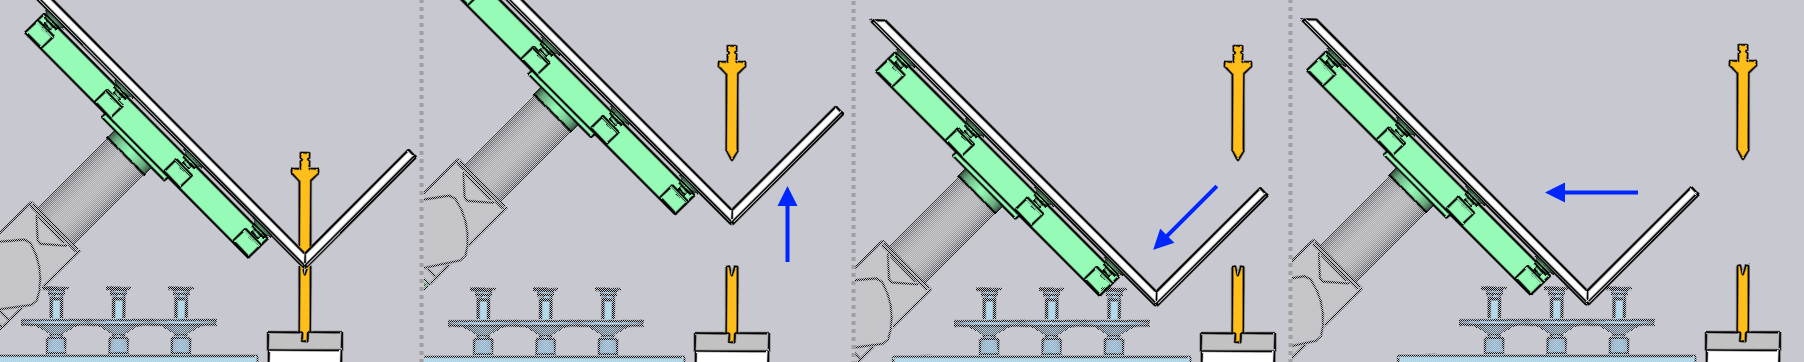
Extraction
After the bending is completed, the part needs to be extracted out from between the punch and the die to prepare it for the next bend. The settings in the Extraction setting let you choose a strategy and then to adjust the different parameters controlling that strategy.
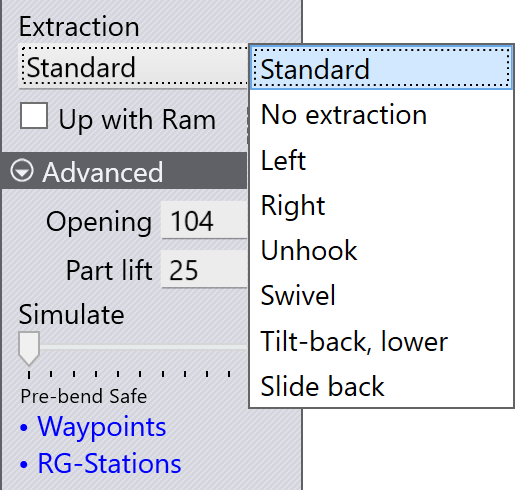
The parameters appear in the Advanced section of the panel, and you can use the Simulate slider to go back and forth through the simulation of this bend, including the extraction. Here are the basic settings:
-
The Extraction list lets you pick from one of the different extraction strategies, and each one is explained below.
-
When the bend is complete, the press beam holding the punch is lifted up to clear the part. The Up with Ram switch instructs the robot to lift up the part in tandem so it travels up along with the beam. This is useful for some strategies, and necessary for some others.
-
The Opening setting controls the beam opening [1] after the bending is done[2].
-
At the start of the extraction, the part is lifted up from the resting position on the die by the Part lift setting before the extraction continues. However, if the Up with Ram setting is turned on, then the part is lifted up along with the beam, and this setting is replaced by the Part lower setting, which controls how much the part is lowered down after the initial stage of travelling up with the beam.
The sections below provide a brief explanation of each of the extraction strategies. Flux will automatically choose one of these strategies to avoid collisions depending on the part geometry. The settings in this section allow you to override the extraction algorithm, or to tweak the parameters for the chosen algorithm.
Standard
The standard extraction method is used by default, when the part needs to be extracted and flipped or rotated in preparation for the next bend.
No Extraction
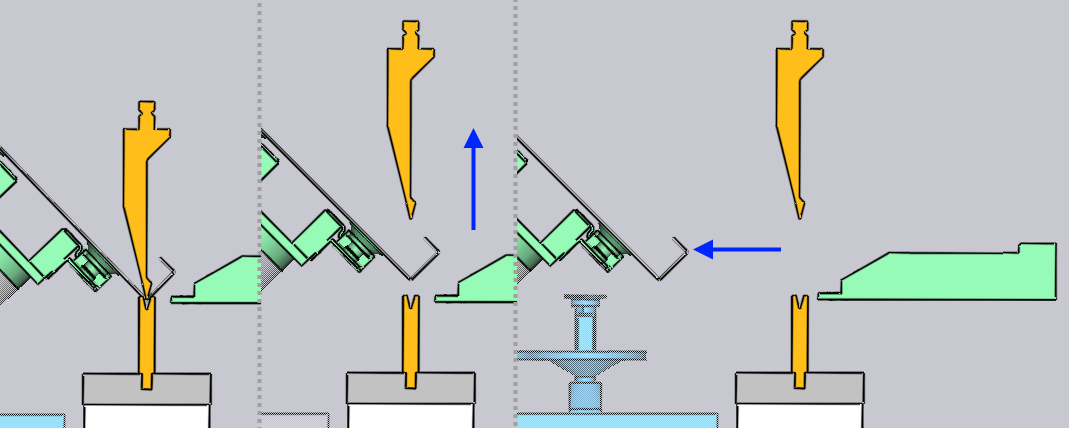
If the next bend is close to the bend that was just completed, and is approximately parallel to it, and has the same bending direction, there is no need to actually extract the part and insert it again. The part just swivels about the Z axis into position for the next bend, as shown in the sequence below.
Left / Right
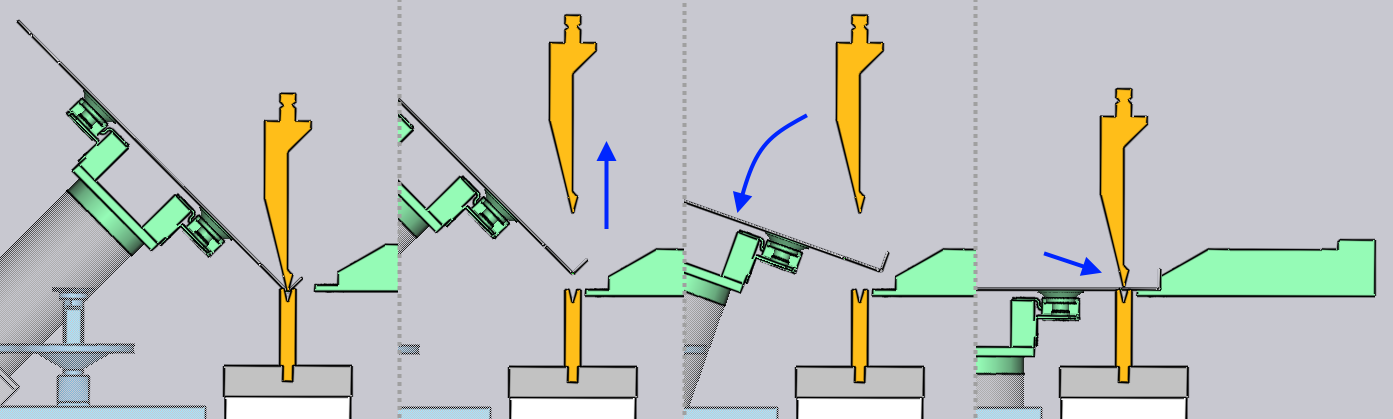
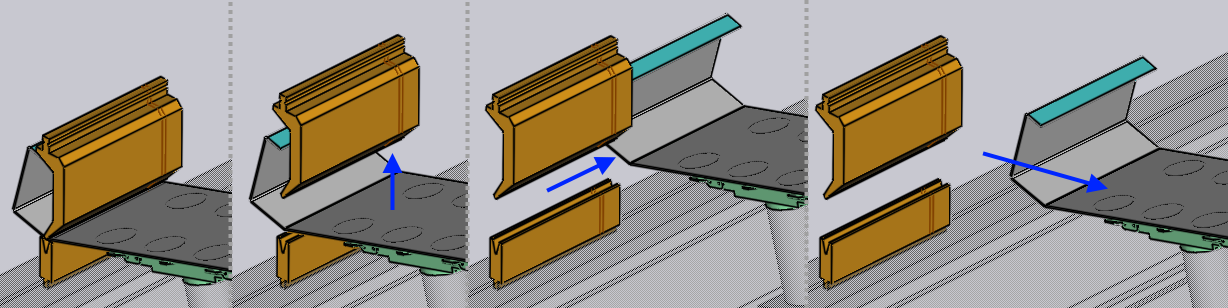
A direct backwards extraction is sometimes difficult because the beam may not be able to be opened sufficiently, or when the part has deep flanges interlocking with the gooseneck tool, as shown in the image below.
The part can then be extracted to the left or right by using this strategy. The Side shift parameter controls the sideways shift of the part (in Z direction) before extraction.
Unhook
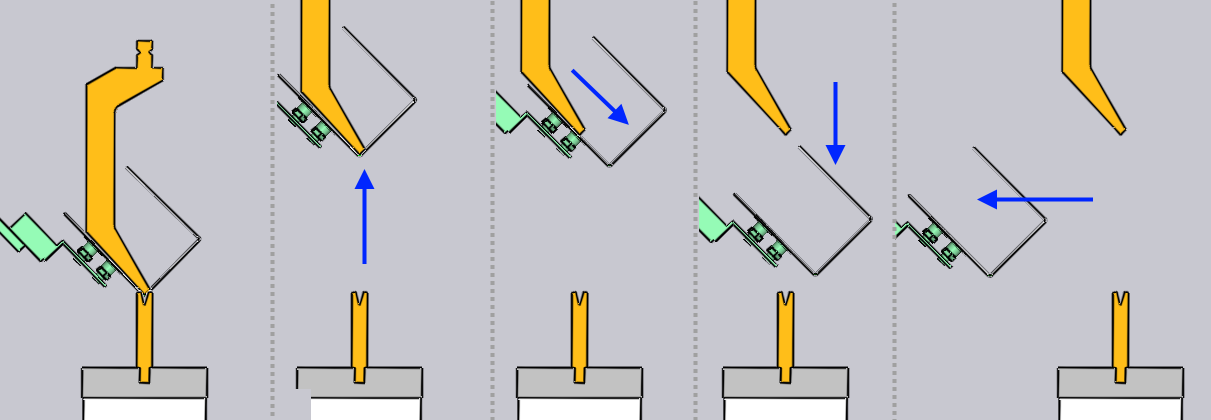
With this strategy, the part is slid diagonally forward and downwards by the Slide parameter, then lowered and extracted out. The image below shows the stages of this process.
Swivel
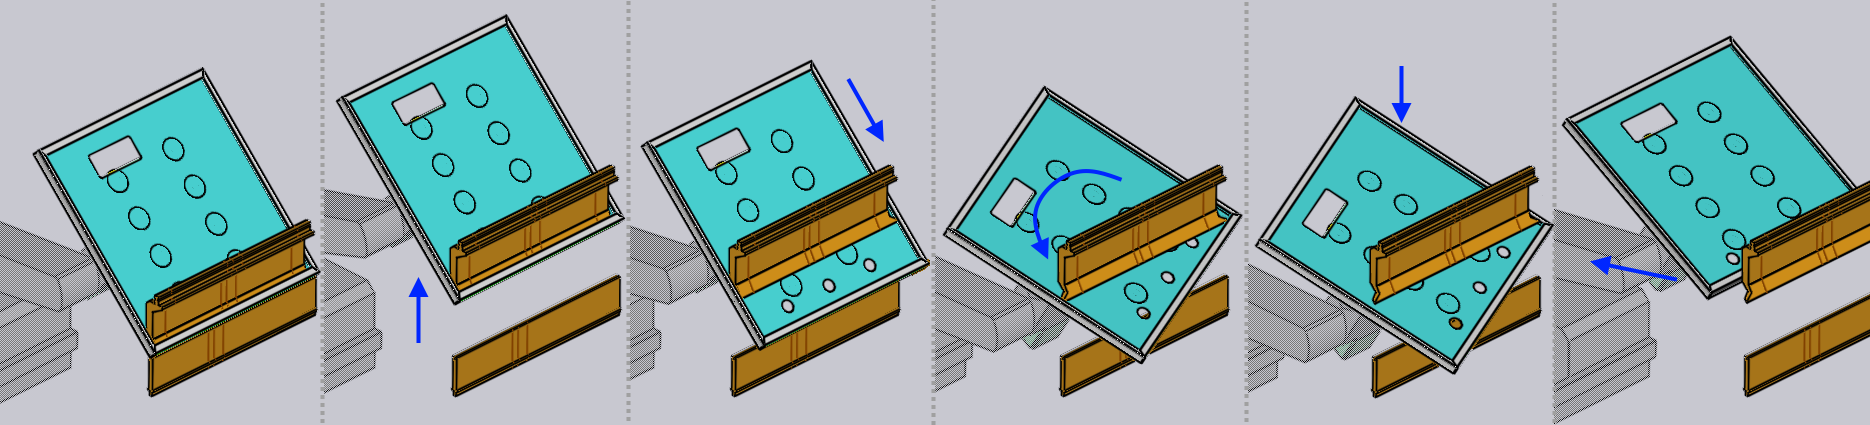
This strategy is used to extricate complex box shapes with inward flanges that require horn-segment tools to process. The extraction consists of several steps, as shown in the image sequence below.
-
The part is first slid forward and down by the Slide parameter.
-
Then, the part is pitched back by the Pitch parameter, and then swiveled about the wrist axis by the Swivel parameter.
-
The side flanges should now be clear of the outer horns of the punch, and the part can then be lowered and extracted out.
Tilt-back, lower
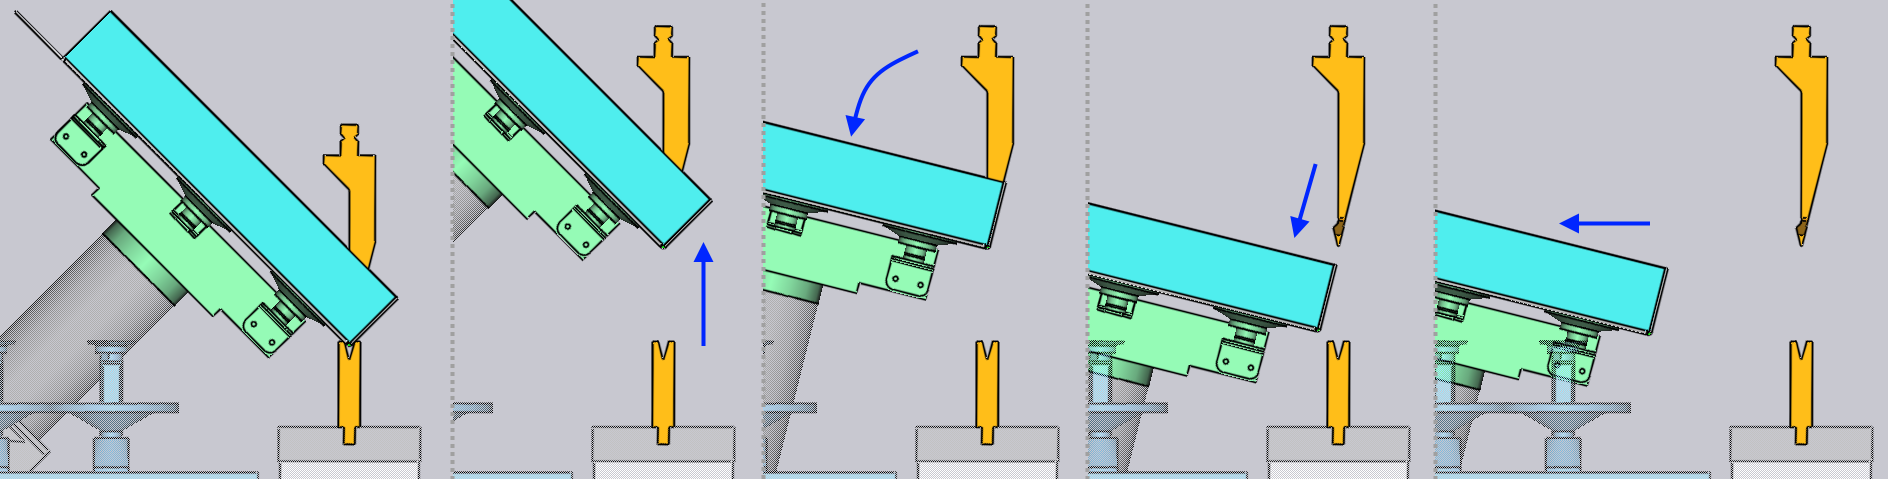
This strategy is when a tall flange is being processed with a narrow angled tool. To make extraction easier, the part is tilted back until the flange lies parallel with the back face of the tool. Then, it is slid down in that parallel direction before being extracted:
Slide back
This is another strategy that can be useful with tall flanges. The part is slid backwards and downwards by the Slide parameter before being extracted out.