
Flux Reference Manual

  • Welcome to Flux
  • Introduction
    • Installing the software
    • The user interface
    • Part workflow
  • CAD
    • 2-D Import
      • 2-D Cleanup
    • 3-D Import
      • Import 3D Model
      • Import assembly
      • Form detection
      • Component detection
    • Modifying the geometry
    • Attachments
  • Laser CAM
    • Part workflow
      • Editing panels
        • Laser cut
          • Approach
          • Withdrawal
          • Microjoint
          • Advanced
        • Contour
        • Scrap cut
        • Part
        • Corner treatment
      • Quick-Nest
    • Job workflow
      • Job panel
        • Sheets tab
        • Parts tab
        • Layouts tab
        • Summary tab
      • Edit layout
        • Nesting modes
        • Placement panel
        • Sequencing
        • Slice sheet
    • Bevel cut
      • Open contours
      • Variable bevel
      • Miscellaneous
    • Advanced
      • Finishing rules
      • Edit LTT
      • FlyLine
      • TwinLine
        • Strategy
        • Microjoints
        • Further settings
      • DetectLine
  • Bend CAM
    • Create bend data
    • Bend navigator
    • Edit bend data
      • Edit a bend
      • Edit a tool mount
      • Edit a bend setup
      • Edit the back-gauges
      • Edit angle measurement
      • Bends spreadsheet
      • Changing the sequence
      • Adding setups and stations
    • Advanced
      • Angle measurement
      • Batch process
      • Recompute solution
      • Tonnage check
    • Bending Aids
  • BendMaster CAM
    • Bend navigator
    • Part pickup
      • Pickup from pallet
      • Pickup from dispenser
    • Robotic bending
      • Insertion
      • Bending
      • Extraction
    • Regripping
      • Regrip panel
      • Add regrip
      • Edit regrip
      • Regrip with jaw
      • RG-Stations panel
    • Part deposit
      • Deposit panel
      • Repeat and sequence
      • Add separator sheets
      • Lock part-rest
      • Deposit pattern types
    • Advanced
      • Waypoints
      • Cell configuration
      • Custom Cell Components
      • Gripper database
        • Create a gripper
        • Import gripper from DXF
        • Import Suction Cup
  • FlexCell CAM
    • Bend navigator
    • Part pickup
      • Pickup from pallet
      • Centering table
    • Robotic bending
      • Insertion
      • Bending
      • Extraction
      • Advanced
    • Regripping
      • Regrip panel
      • Add/Remove regrip
      • Gripper Panel
      • RG-Stations panel
    • Part deposit
      • Deposit panel
      • Deposit Tabs
    • Advanced
      • Waypoints
      • Cell configuration
      • Gripper database
        • Create a gripper
        • Import gripper from DXF
    • Troubleshooting
  • Fold CAM
    • Create fold data
    • The Fold view
    • Editing Fold data
      • Edit a bend
      • Edit a side/section
      • Change the sequence
      • Edit the blank-holders
      • Edit the gauging
      • Edit the blades
      • Edit the loading
      • Edit the unloading
    • Tool inventory
    • Advanced
      • Custom air-gap tables
      • Manual bend completion
      • Required flange length
  • Settings
    • Drawing
      • Layers
      • Dimensions
      • View
    • Bend CAM
      • Machine defaults
      • Bend outputs
      • Bend view
      • Bend cell
    • Cut CAM
      • Layout
        • Nest settings
        • Sheet
        • Sheet handling
        • Skeleton cuts
        • Work support
      • Laser CAM
        • Sequence
      • Cut outputs
      • Cut view
    • Panel bending
      • Defaults
      • ZBW carriers
      • Outputs
    • Reports
      • Item defaults
    • Import/Export
    • Environment
  • Database
    • Materials
    • Machines
    • Bend tools
    • Bend deductions
    • Bend grippers
    • Forms and Components
  • Reports
    • Report designer
    • Fields, pictures and tables
    • Bands (sub-reports)
    • Labels, bitmaps and shapes
  • Appendix
    • Supported 3D formats
    • Separator sheet DXF
    • Bend tool DXF
    • The Adapt Geometry feature
Laser CAM
/
Job workflow
/
Job panel

Job panel

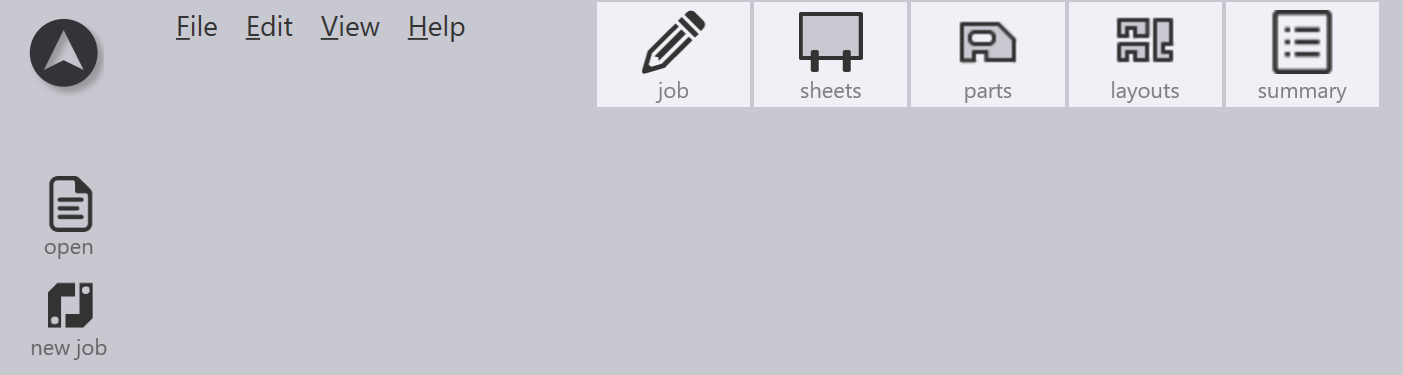
When you create a new nesting job, or open an existing nesting job from a file, the job panel is displayed at the top of the screen:
Job Panel

The job panel has several tabs, and you can access them with shortcut keys as shown in the table below.

Tab Shortcut Key Explanation

Job

I

Edit the job settings (material, LTT etc)

Sheets

S

View the list of sheets, add or remove sheets

Parts

P

View the list of parts, add or remove parts

Layouts

L

View the layouts computed by the nesting engine

Summary

U

View a summary of the entire nest

Job tab

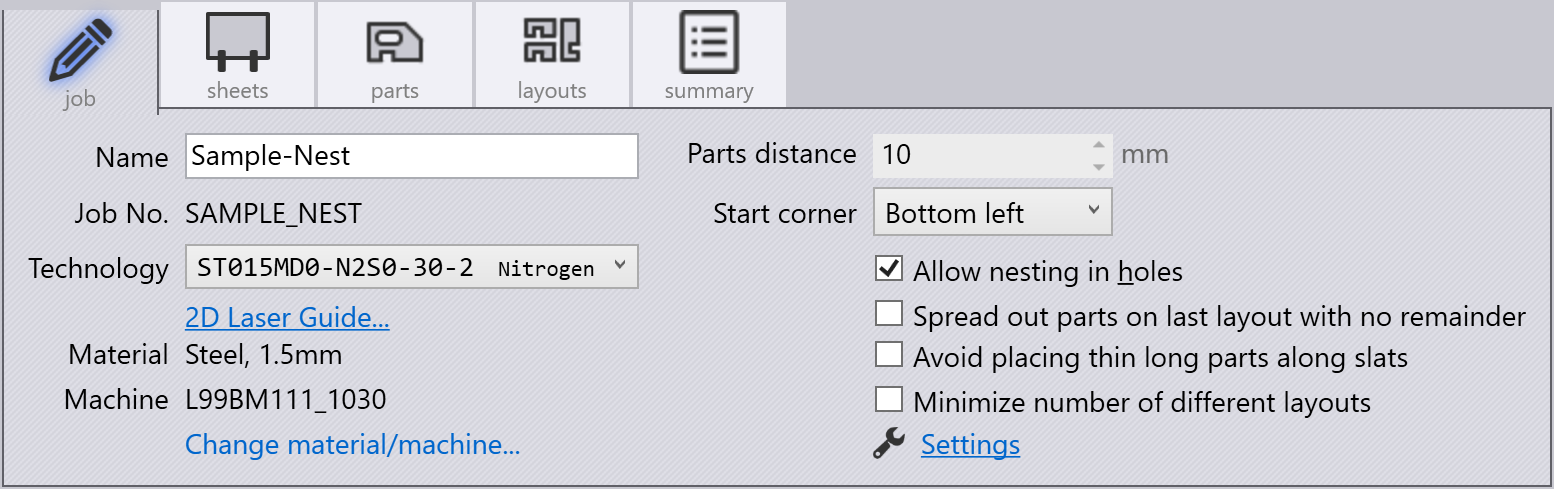
The job tab displays some the information that was entered in the New Job dialog, and provides some more settings for the nesting engine to use while computing the nest.
Job Tab
  • Techology: You can select a different LTT to use (for the specified machine, material and thickness). The LTTs that are most frequently used are listed first, and are tagged with a star icon.

  • Parts distance: This setting is used to specify the minimum allowable distance between parts (also known as the bridge width) during nesting.

  • Start corner: Specifies the corner of the sheet from which the nesting will start.

  • Allow nesting in holes: If turned on, small parts will be nested inside the holes of larger parts, where possible.

  • Spread out parts on last layout with no remainder: If this is turned on, then Flux will take the last sheet of the nest that has insufficient space left to be used as a remainder sheet, and will spread out the parts on that sheet to minimize heat dissipation problems (since there is no reduction in nesting efficiency anyway).

  • Avoid placing thin long parts along slats: If turned on, long and thin parts will be placed across the support slats rather than along them, to minimize the risk of the parts falling in between the slats.

  • Minimize number of different layouts: If turned on, Flux will try to repeat layouts multiple times (within the constraints on required part quantity) to minimize the number of different layouts created.

Changing material / machine

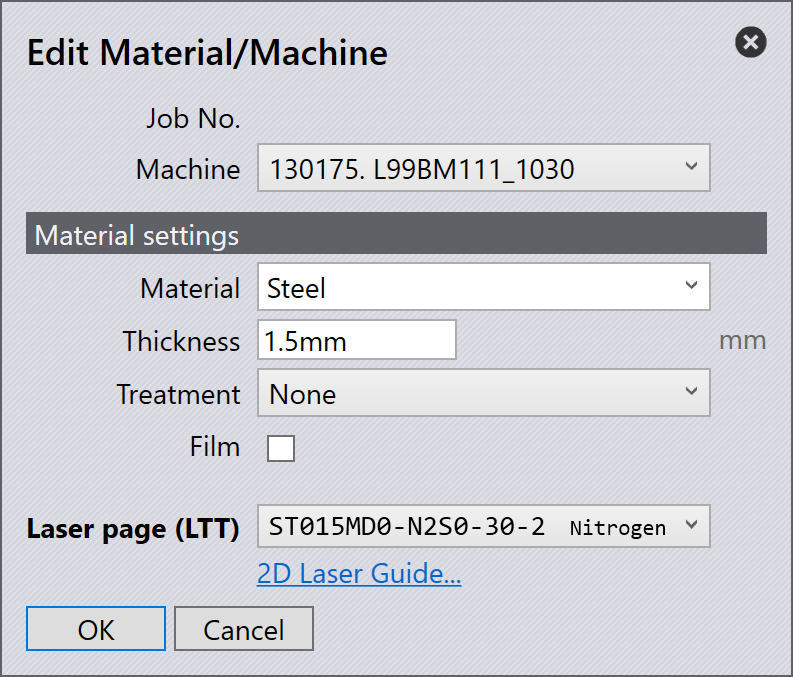
You can click on the Change material/machine link in the Job tab to change the machine and the material used for nesting. This will re-tool all the parts with for the new machine and material and redo the nest. Clicking this link brings up a dialog like the one below, where you can enter the new settings:
Edit Material

Contents

  • Job tab
  • Changing material / machine
Job workflow Sheets tab

      Copyright © 2025 TRUMPF Metamation. All rights reserved.

    Compiled by Bento