Scrap cut
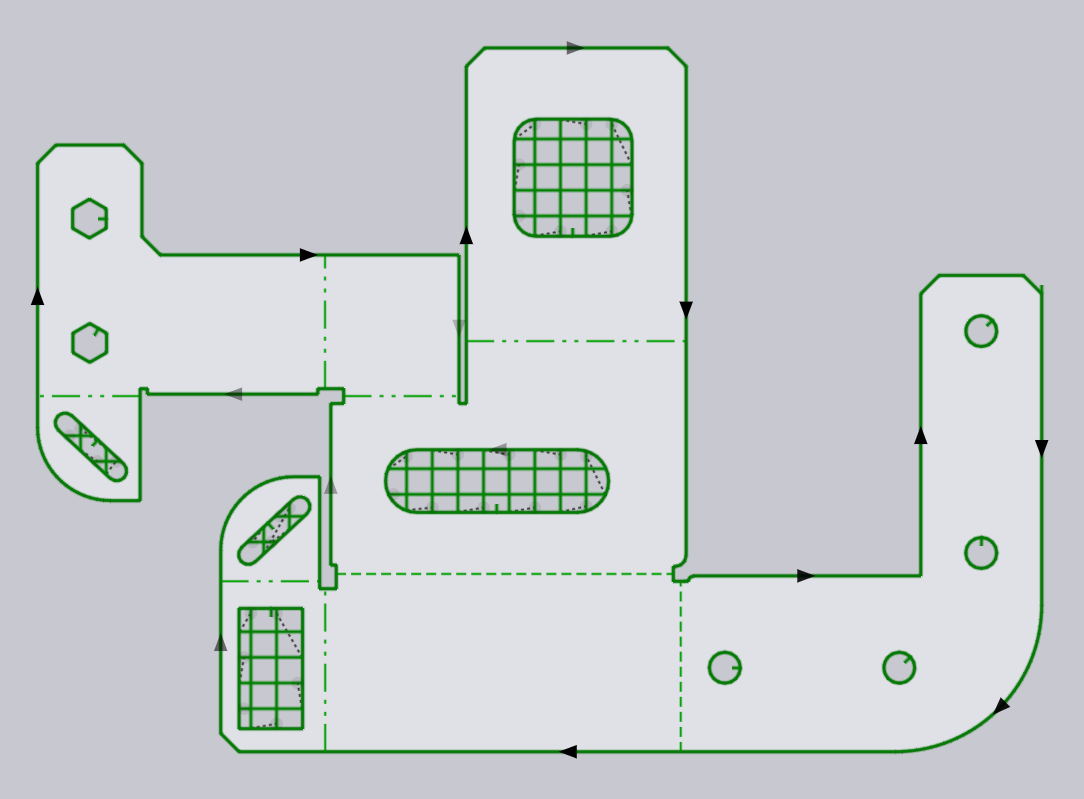
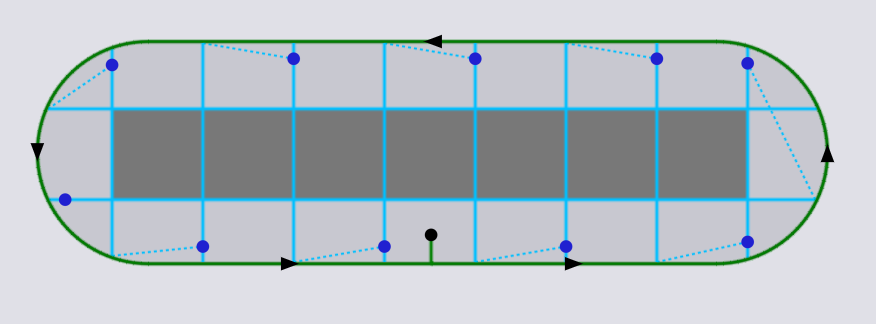
If there are large holes in the part, the resulting slugs may not fall cleanly through the slats and can cause a tipping hazard. One way to avoid this is to add microjoints to hold the slug in place. Another way is to cut up the slug into small pieces using Scrap cutting, as shown in the image below:
Adding scrap cuts
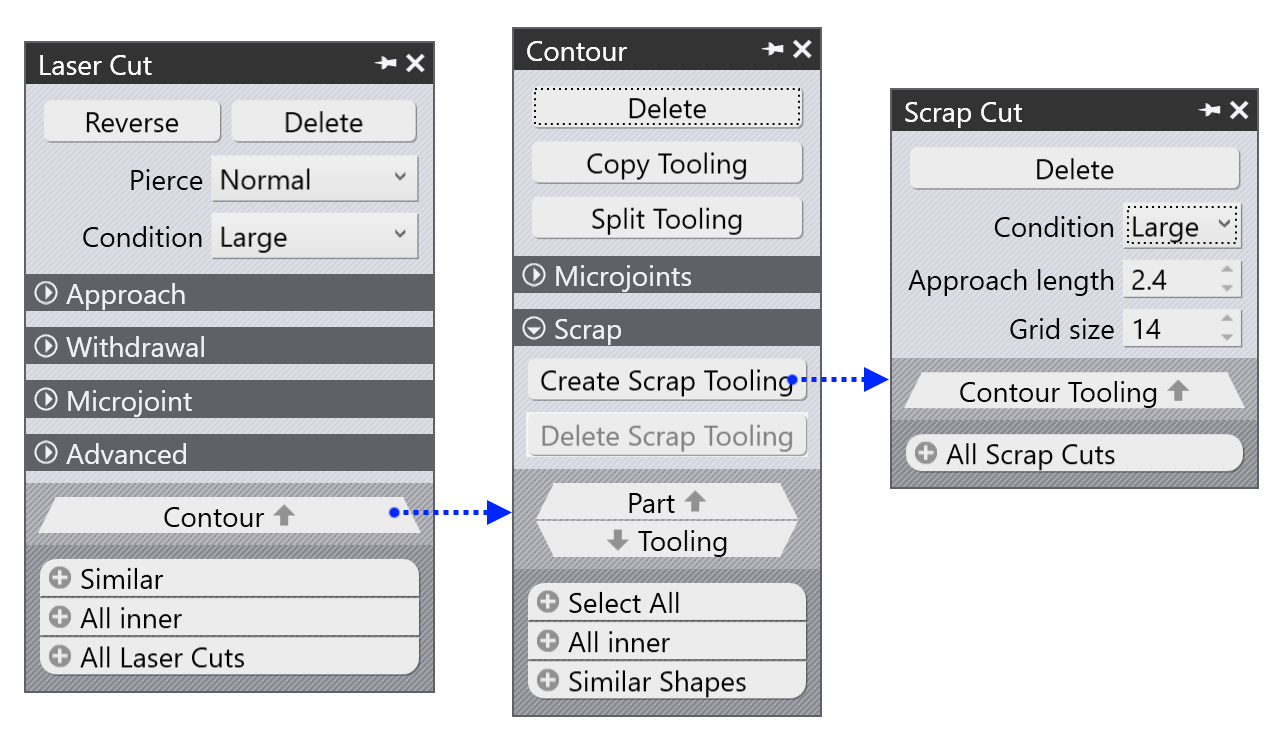
To add scrap cutting for a hole, click on the laser tooling of the hole. This brings up the laser cut panel, from where you can click on the Contour navigator and then click on Create Scrap Tooling:
-
Condition: Select the cutting condition for scrap cutting. Since the cutting quality of the scrap cuts is not critical, it is common to choose a high speed condition such as Large for this.
-
Approach length: The distance of the pierce points (for the scrap cuts) from the hole contour. After piercing, the laser will approach close to the contour and at a suitable distance (determined by the kerf width), make a 180 degree turn and start the scrap cutting.
-
Grid size: This is the maximum size that any scrap cut piece will have (in length or width). As you adjust this, you can see the scrap cutting getting recomputed. Use a size that is small enough to ensure that the resulting squares will fall through the slats, regardless of position.
-
Delete: Deletes the scrap cutting tooling for the hole.
When Scrap Cuts are added for a hole, any microjoints on that hole tooling are removed, since they are no longer needed. Conversely, if you add microjoints to a hole tooling, any scrap cutting on that hole is removed.
Automatic scrap cuts
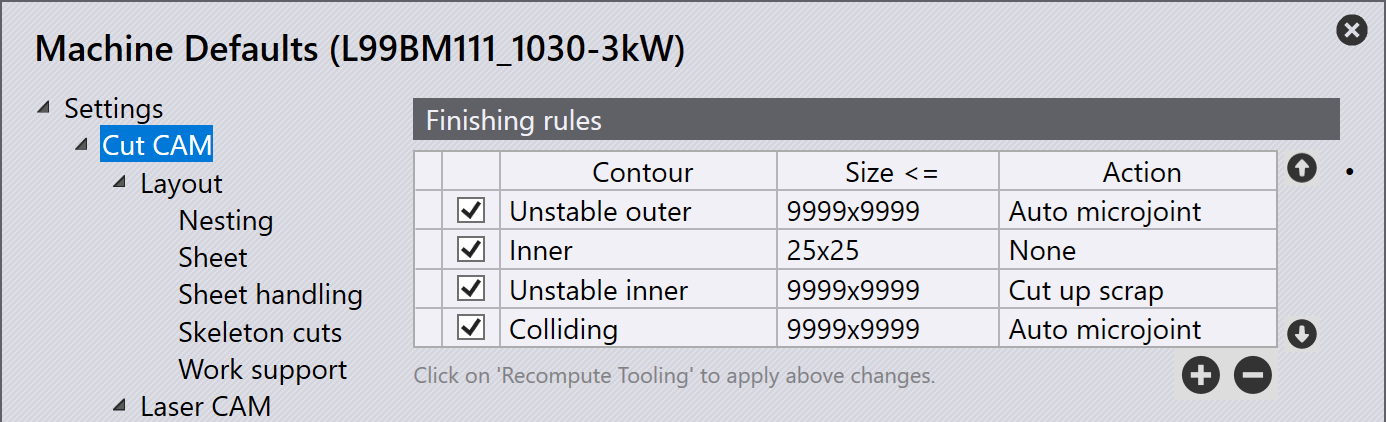
You can use Finishing Rules to set up automatic scrap cutting. For example, here is a rule setup that specifies scrap cutting for holes above a certain size that may cause issues:
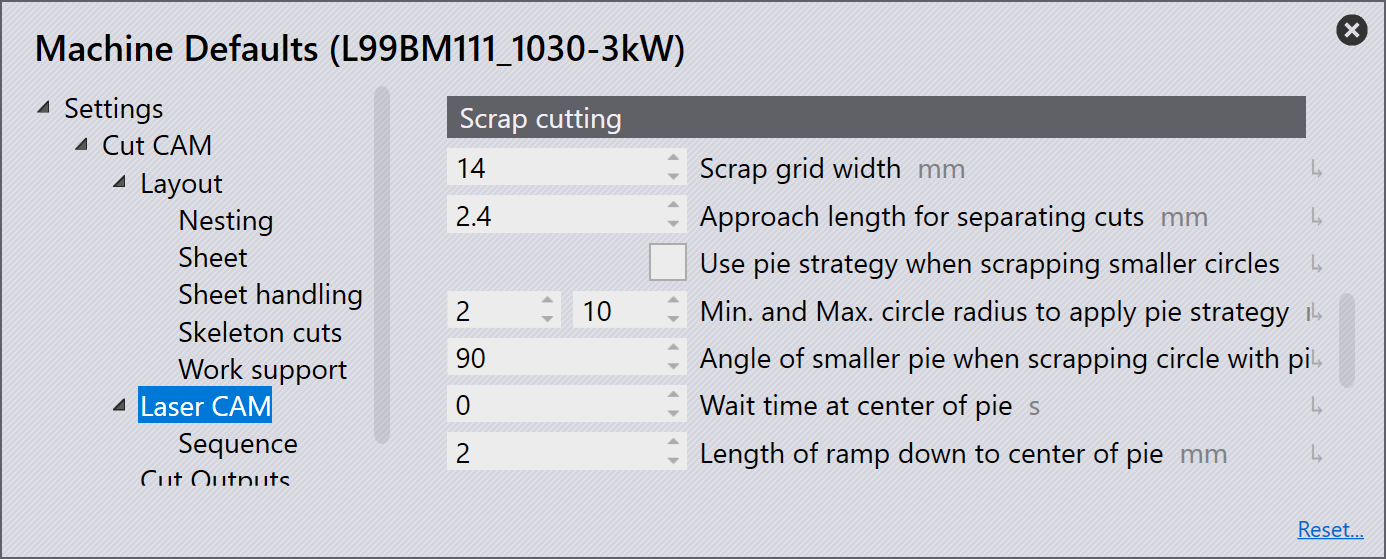
We also can set up the parameters (like grid size and approach length) for these scrap cuts in the Scrap cutting settings:
With these in place, the auto-tooler will create scrap cuts when the part is tooled up (for all the holes that qualify) as shown in the image below: