
Edit LTT
Flux has a wide variety of LTTs (Laser Technology Tables) compatible for every laser cutting machine. These tables can be viewed and some sections of them can be edited using the LTT Editor. To access the LTT editor, click on the Laser button on the toolbar at the left, or press the K key. Laser button is displayed only when you have a laser part or layout open, and it displays the LTTs for the machine in use.
LTT Editor
The LTT Editor looks like the image below. The list on the left shows all the LTTs, sorted by material, then by thickness, and finally by assist gas type.
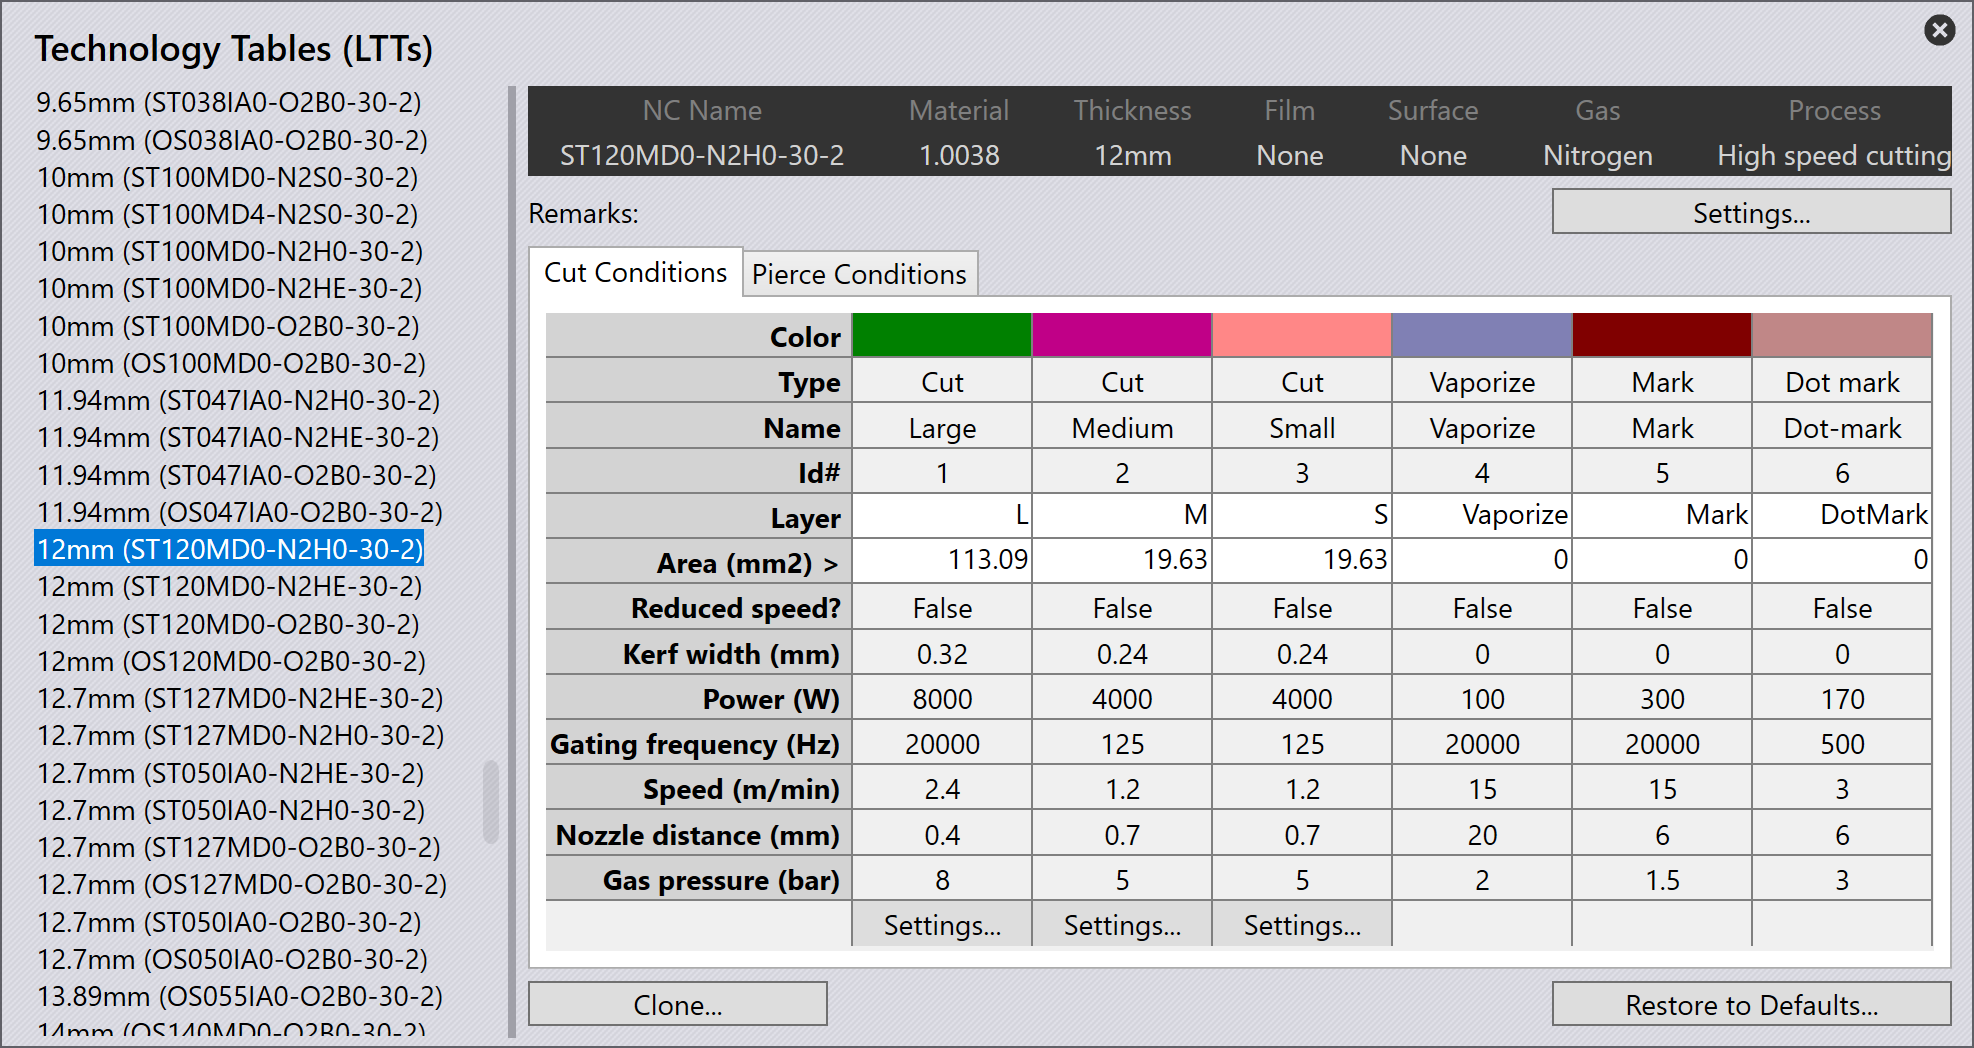
The page has a header at the top that displays the basic settings of the LTT page. The Cut Conditions tab displays the cutting conditions. Each column in the table displays one cutting condition, and you can edit the few settings that have a white background.
Pierce Conditions
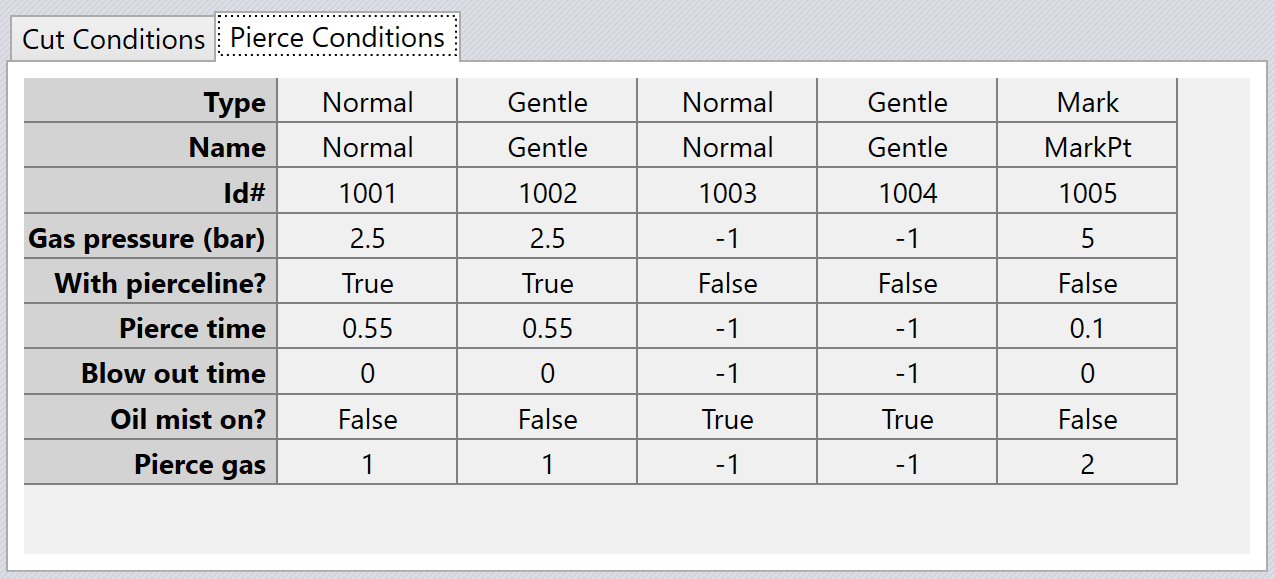
The Pierce Conditions tab displays the data for the different pierce types available for this LTT.
Cut Condition settings
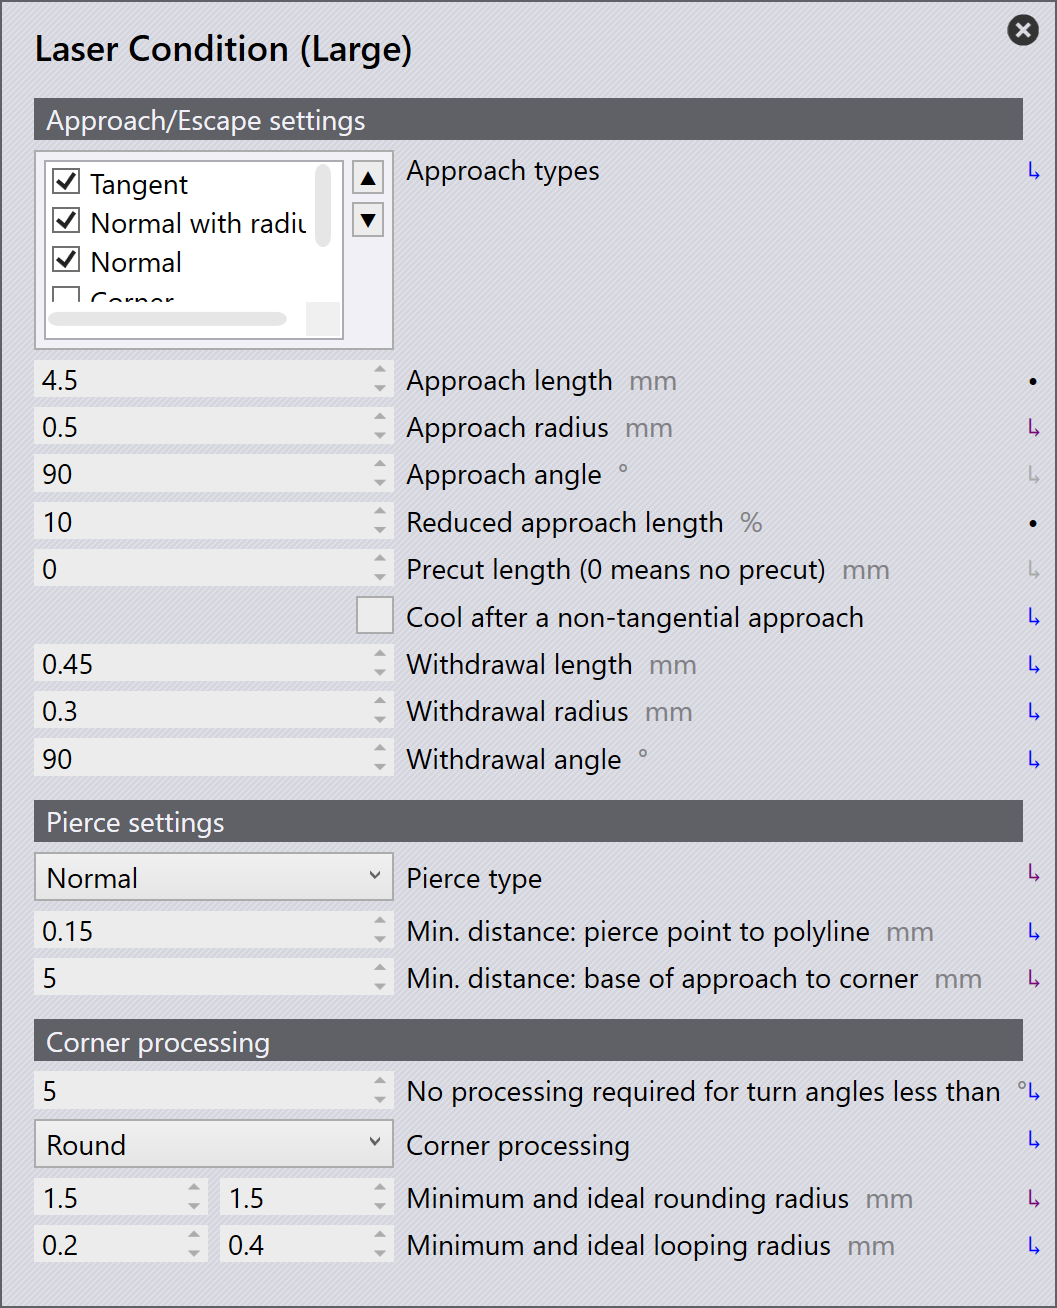
The Cut Conditions that actually do cutting (as opposed to marking or vaporizing) have some additional settings that are accessed by clicking the Settings buttons underneath the condition. Clicking this brings up an editor like the one below, where various settings for this condition can be edited.
LTT Settings
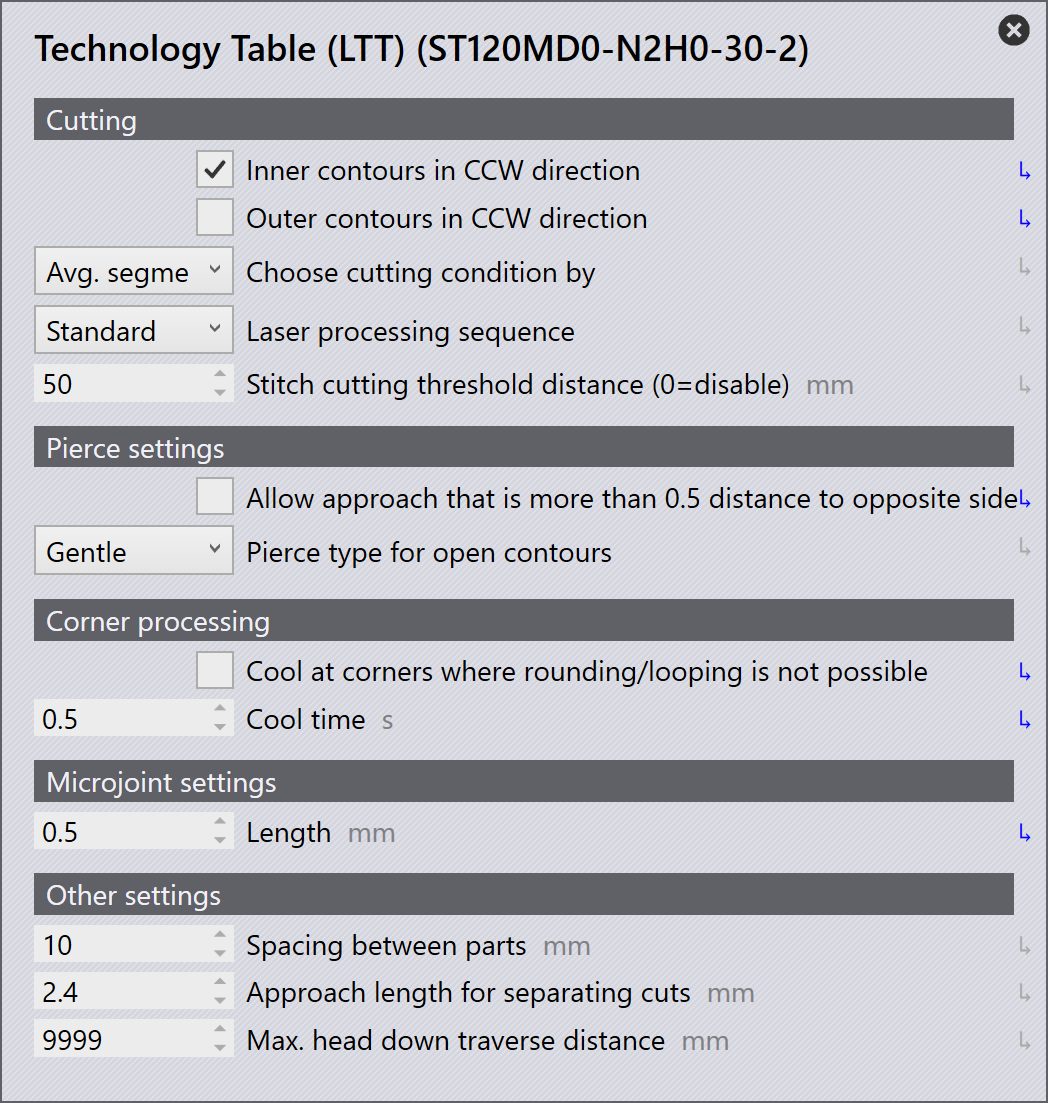
In addition to the settings above (which are different for each Cut Condition), the LTT as a whole also has some settings that can be edited by clicking on the Settings button at the top right:
Cloning an LTT
A complete LTT can be cloned by clicking the Clone… button, which brings up the following Clone dialog:
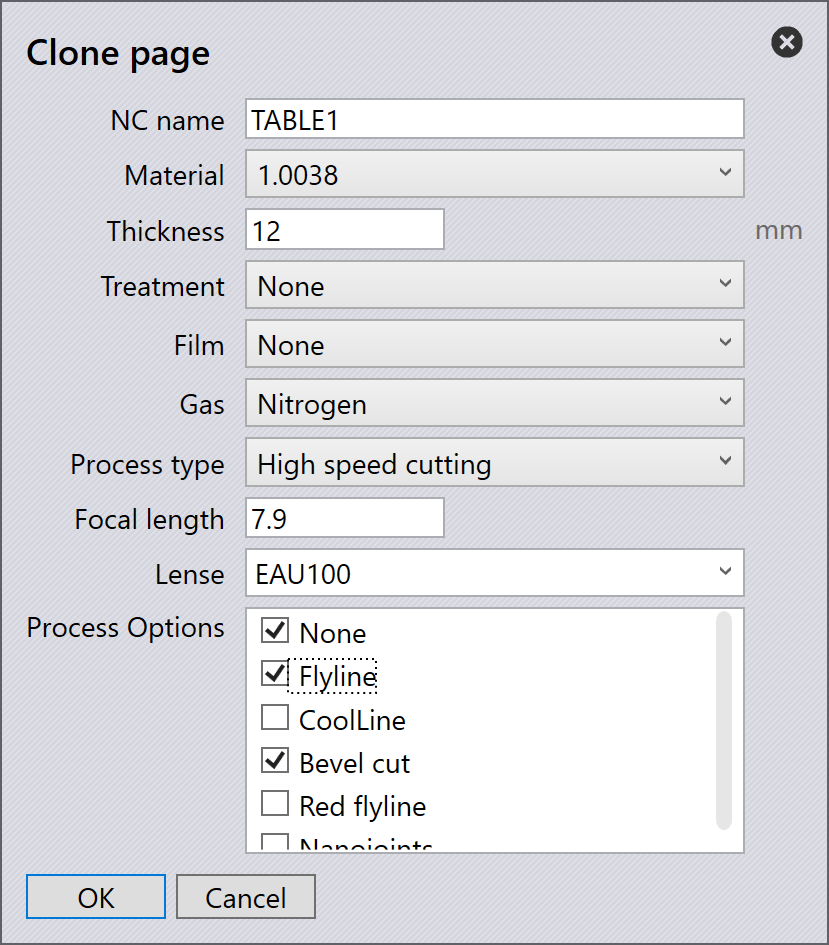
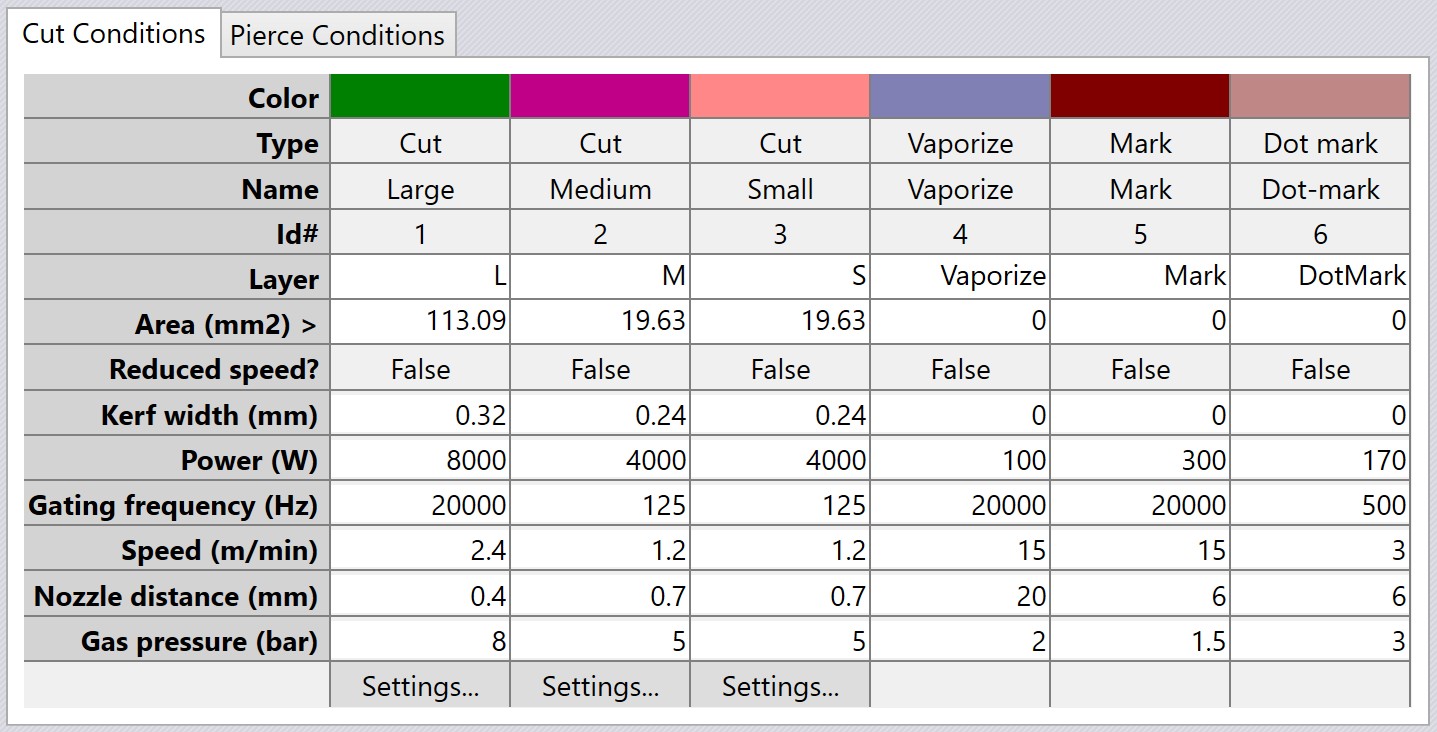
This creates a custom LTT where more fields become editable. The image below shows the expanded set of editable fields on the Cut Conditions page:
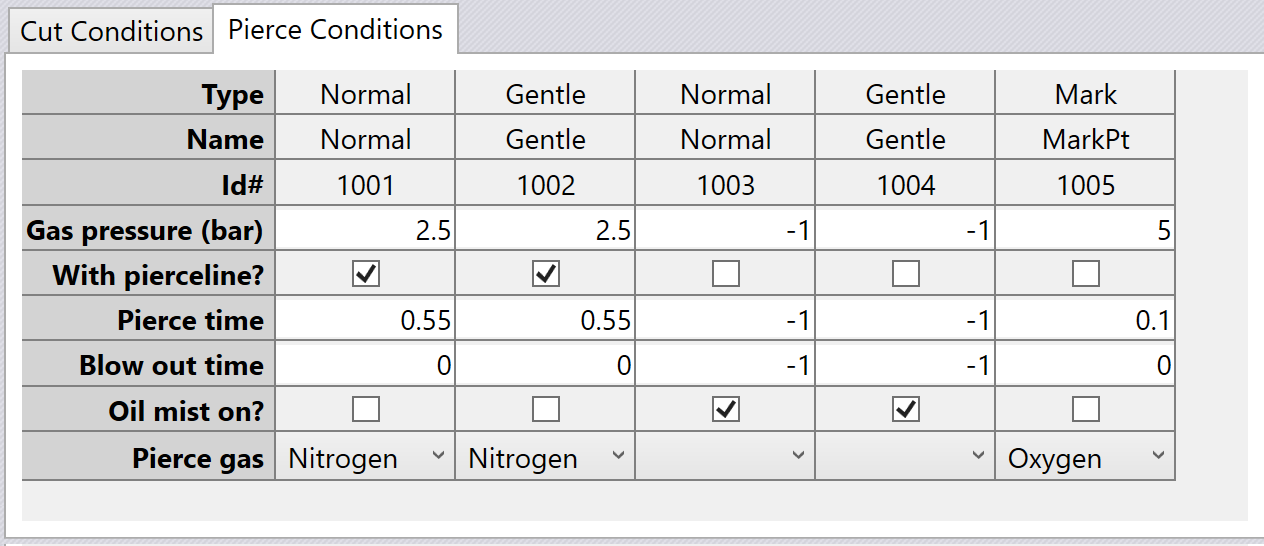
The image below shows the expanded set of editable fields on the Pierce Conditions page:
| Using a cloned LTT page requires you to set up a similar page on the controller as well. Flux does not transmit the details of the cloned LTT to the controller via the LST file. |